June 7, 2025
No Comments
Is Nose Work Right for You and Your Dog? Here’s What You Need to Know Before You Join Class.
We’re thrilled you’re considering joining us for Nose Work/Scent Work—it’s one of our absolute favorite dog sports. Whether your dog is a sniffing superstar or just starting to discover the joys of scent games, Nose Work is a fun, confidence-building activity that taps into your dog’s natural instincts. In short, it rewards your dog for … being a dog!
But before you sign up, there are a couple of important requirements we need to talk about, to make sure both you and your dog are set up for success.
🐾 One Dog at a Time, Please!
Nose Work is a solo sport—only one dog searches at a time. That means while one dog is working, the rest are chilling in their cars, awaiting their turn to shine. It’s an essential part of how the class is structured, and it keeps everyone safe, focused, and stress-free.
So here’s the biggie:
Your dog must be able to wait quietly in your car between turns.
This means:
-
No separation anxiety meltdowns
-
No frantic barking or pawing at windows
-
No singing the song of their people between every search
If your dog isn’t yet comfortable being alone in the car, that’s okay! But Nose Work class might not be the right fit yet. We’re happy to help you work on that skill separately, so you can join us down the line.
🌞 “But What About Leaving My Dog in the Car in Summer?”
We get it. There’s a lot of fear out there about leaving dogs in cars—and some of it is absolutely warranted. But in this case? You’re safe. Here’s why:
-
Our parking lot is shaded by the building in the afternoon and evening
- We’re lucky in the desert that there is almost always a breeze in the evenings
-
You’ll be going back and forth to your car frequently during class
-
You’re more than welcome to leave your car running with the A/C on if you prefer
-
We keep class moving quickly so your dog won’t be waiting long
And just for peace of mind—our training center is located in a safe South Reno neighborhood, and we’ll never be far from your dog. Our instructors are dog lovers and Nose Work afficionados, too—we’d never ask you to do something that wasn’t safe.
🚶♀️ Human-Friendly and Dog-Tolerant, Too
Nose Work is a low-interaction sport, but your dog will still need to be able to:
We’re not asking for picture-perfect leash manners or tail-wagging friendliness—just basic neutrality. Unlike most dog sports, in Nose Work, dogs will never come into direct contact with each other, which makes this sport open to dogs who don’t particularly like other dogs. That said, if your dog barks, lunges, or becomes stressed when seeing another dog from about 15 feet or greater, this might not be the right class just yet. (But we’ve got other options to help you get there!)
In short, here’s what your dog needs to be ready for class:
✅ Able to rest quietly in your car between turns
✅ Comfortable being alone for short periods (even in summer!)
✅ Non-reactive and relaxed around unfamiliar humans
✅ Able to pass by another dog at a distance of about 15 feet without barking and lunging
Got questions or aren’t sure if your dog is ready? Reach out—we’re always happy to help you find the right fit.
Nose Work is one of the most enriching activities you can do with your dog—and we’re excited to help you get sniffing!
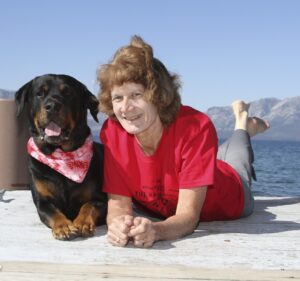 ation for dogs (and the occasional bunny/cat/goat/horse) in Reno. In 2004, Beth became one of the first two licensed animal physical therapists in Nevada, and has worked with many dogs recovering from injury/surgery, and those living with chronic neurological and orthopedic conditions. During her career as a physical therapist for humans, she served as a geriatric clinical specialist for 20 years, pursued advanced training in body work and movement education, was certified in Pilates, and earned a master’s degree in counseling and educational psychology. In 2021, she completed the Dancing Hearts Academy coaches’ training, and expanded her work to help people and dogs cooperatively live their best lives together.